Shopify
This use case outlines how to securely integrate a Shopify store with the Blackwall GateKeeper platform. While Shopify manages the content and commerce layer, GateKeeper acts as a protective edge, offering SSL termination, bot mitigation, and performance enhancements — without disrupting the Shopify experience.
The steps covered in this guide ensure that your domain is correctly configured both within Shopify and GateKeeper, and that DNS routing and SSL provisioning are correctly handled. You’ll also learn how to address Shopify-specific constraints, such as the platform’s requirement for the www subdomain to point to its own infrastructure.
Domain Configuration (Shopify)
Before configuring GateKeeper, your Shopify store must be correctly set up with a custom domain and pointed to Shopify’s infrastructure. To do this, perform the following steps:
- Ensure that your Shopify store is live and functioning correctly, which means that the domain is configured correctly.
- In your domain’s DNS settings:
- Set the A record to point to Shopify’s IP address.
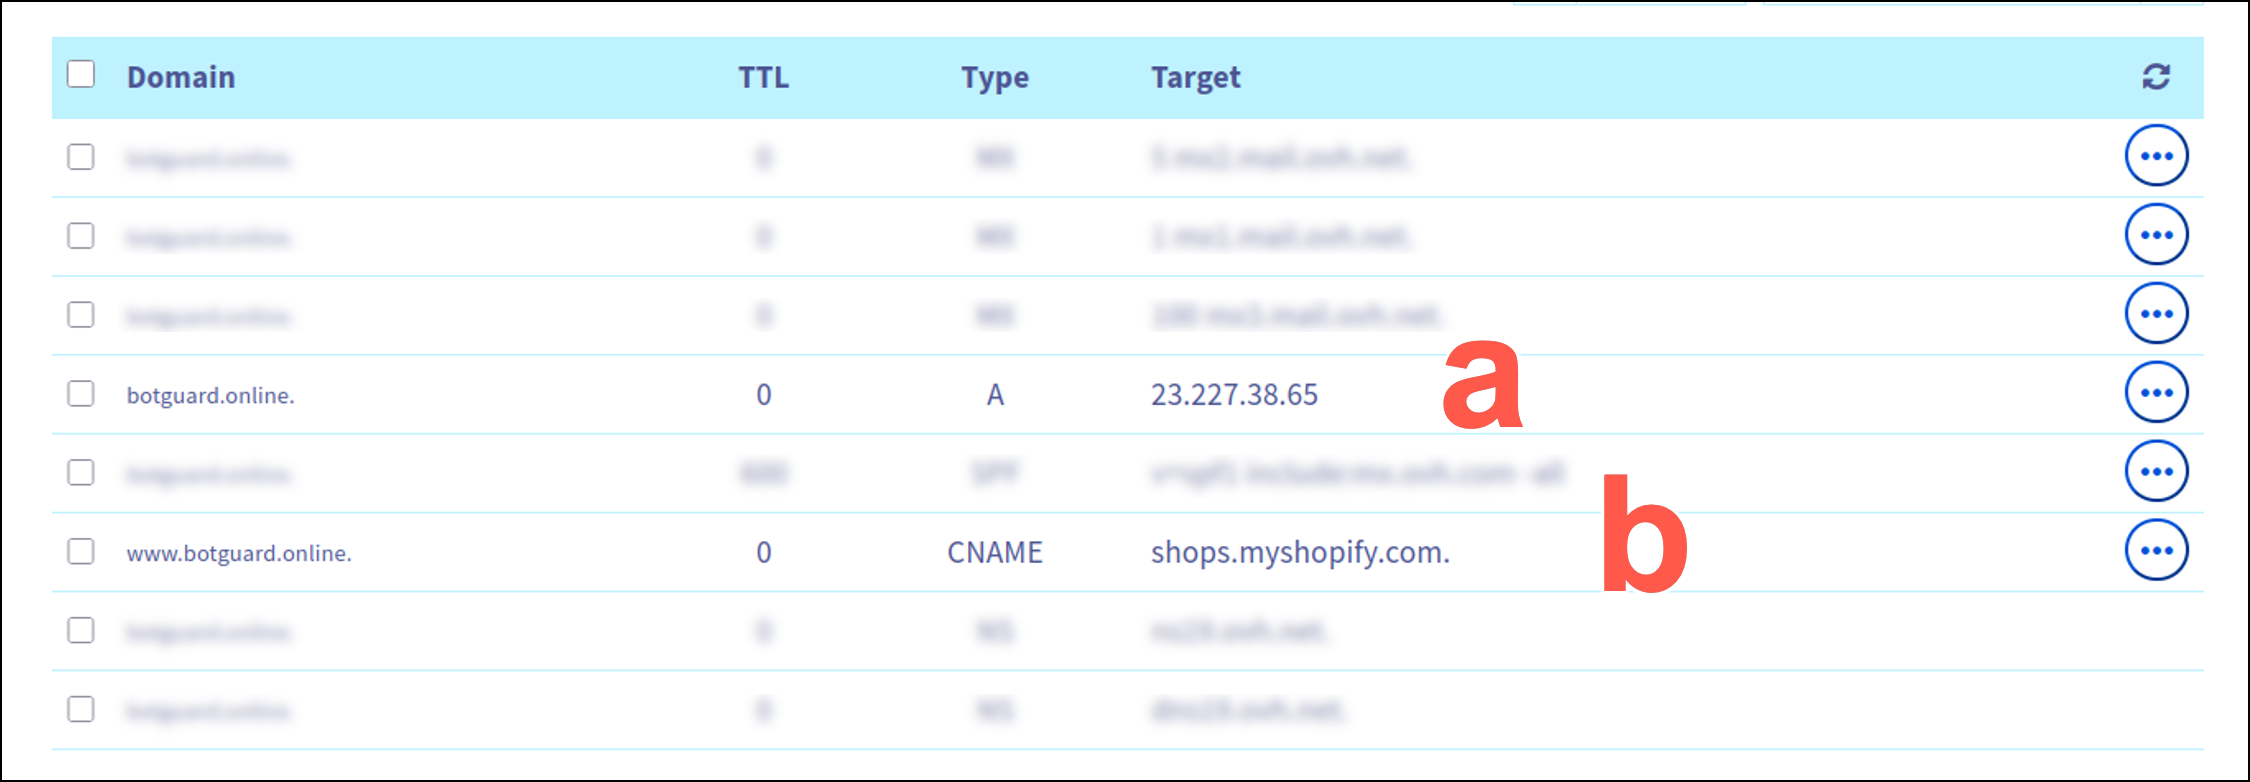
- Set the CNAME for the www subdomain to:
shops.myshopify.com
- Set the A record to point to Shopify’s IP address.
-
In your Shopify Admin console, navigate to Settings > Domains, and confirm that your domain status is connected. It should be similar to this example Shopify UI screenshot.

CNAME Requirements
Because Shopify requires the www CNAME to point to shops.myshopify.com, you cannot include www.yourdomain.com when configuring the domain in GateKeeper. Only use the apex domain (e.g., yourdomain.com) or other subdomains that do not conflict with Shopify’s requirement.
Nginx Configuration (Upstream TLS Compatibility)
In some environments, upstream Shopify servers may not accept connections using TLSv1.3. To ensure compatibility, you may need to restrict Nginx to use TLSv1.2.
- On the GateKeeper host, open the file:
/opt/nginx/etc/nginx/proxy_params - Find the line:
proxy_ssl_protocols TLSv1.2 TLSv1.3; - Modify it to remove TLSv1.3 so it becomes:
proxy_ssl_protocols TLSv1.2; - Test the Nginx configuration:
nginx -t - Reload Nginx:
systemctl restart nginx
Once restarted, Nginx will now only use TLSv1.2 for proxy connections to upstream servers like Shopify.
GateKeeper Configuration
With the Shopify configuration and Nginx configuration tasks are complete, you can now configure the domain in GateKeeper. To do this, execute the following tasks:
- Open a browser and navigate to the public IP of your GateKeeper appliance - https://
. - When prompted, enter your Blackwall API key (used as the GateKeeper management password). To obtain your Blackwall account API key, visit your Blackwall dashboard. For more guidance on accessing your API key, refer to Blackwall account credentials.
- From the top navigation bar, select Domains. A page displays which list your sites that are already protected by GateKeeper. If you don't have any the list will be empty.
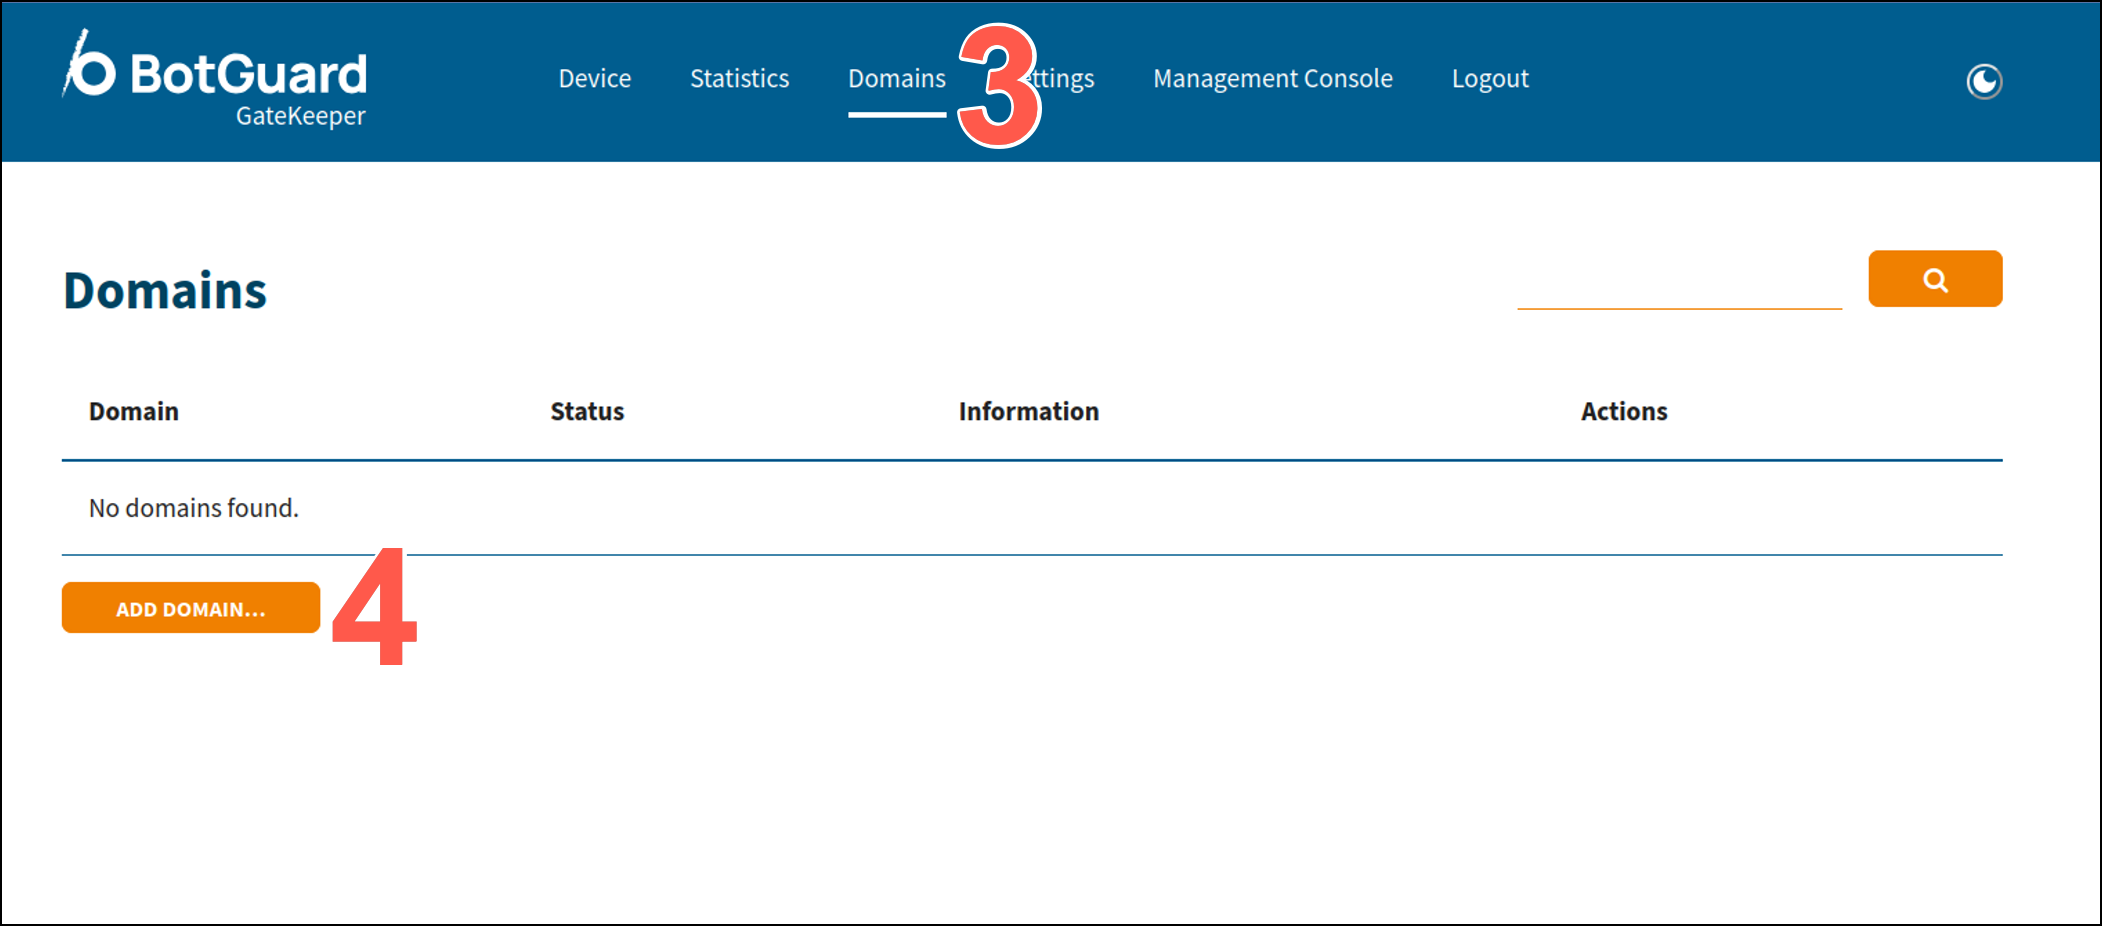
- Click Add Domain to start the wizard.
- Carefully follow the instructions detailed in Adding a domain carefully. If you receive an error, refer to Troubleshooting.
After successful execution of the above instructions, your new domain is now shielded by GateKeeper, SSL is handled automatically, and malicious traffic is filtered before it ever reaches your origin.
Troubleshooting
-
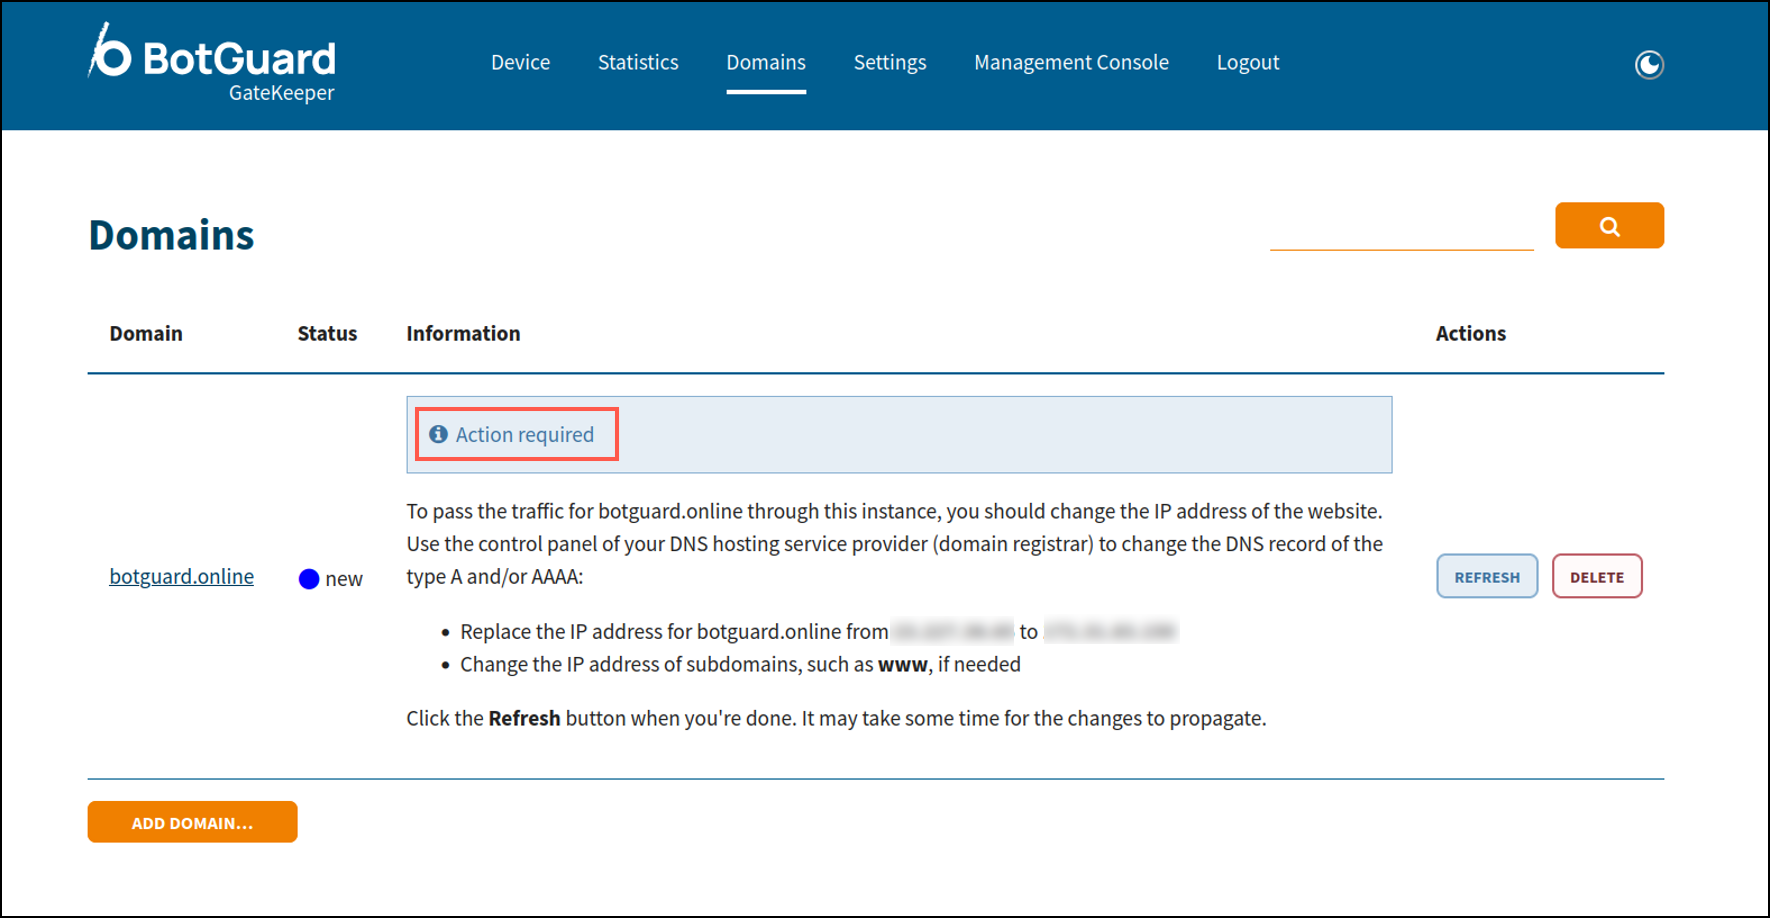
If GateKeeper does not display the correct status, ensure that your domain’s DNS has been updated correctly. The A (IPv4) and/or AAAA (IPv6) records must point to the public IP address of your Blackwall GateKeeper instance. Otherwise, you will receive an error similar to this:
-
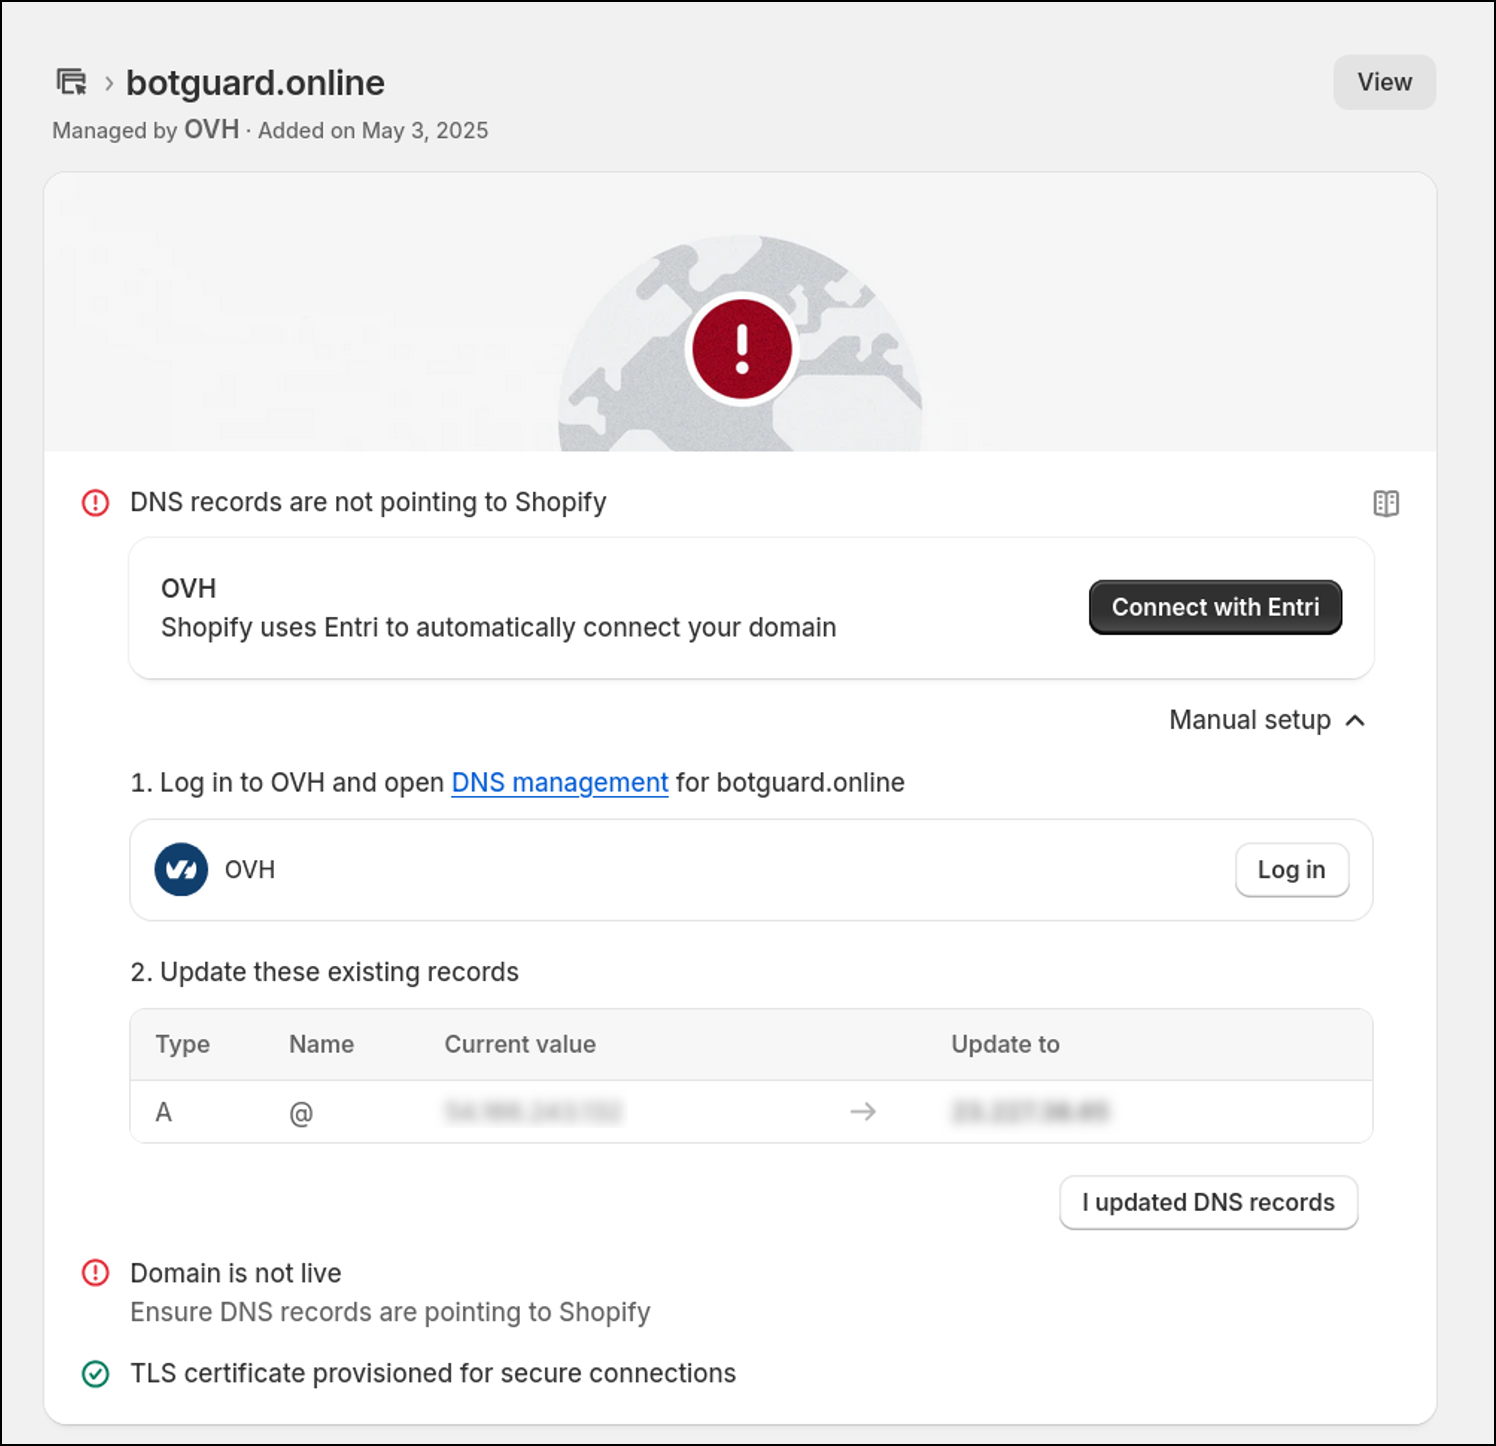
Remember that over time Shopify may periodically check that your domain is pointing to the Shopify end-point. If there is any incompatibility, then you can expect to see something like this in your Shopify dashboard's Domain section.