Domains
The Domains page in Blackwall GateKeeper provides a centralized overview of all domains currently managed by your GateKeeper instance. From this page, you can quickly see the status of each domain, perform searches to locate specific entries, and access configuration, such as modifying domain settings or removing a domain entirely. Use this documentation to become familiar with the Domains overview before moving on to detailed sections about configuring individual domains or adding new ones.
- In your web browser, open Blackwall GateKeeper’s login page.
- Authenticate using your user credentials.
- In the top menu bar of GateKeeper’s UI, click Domains, which displays the Domains page. This page contain a tabular list of all domains currently managed by your GateKeeper instance.
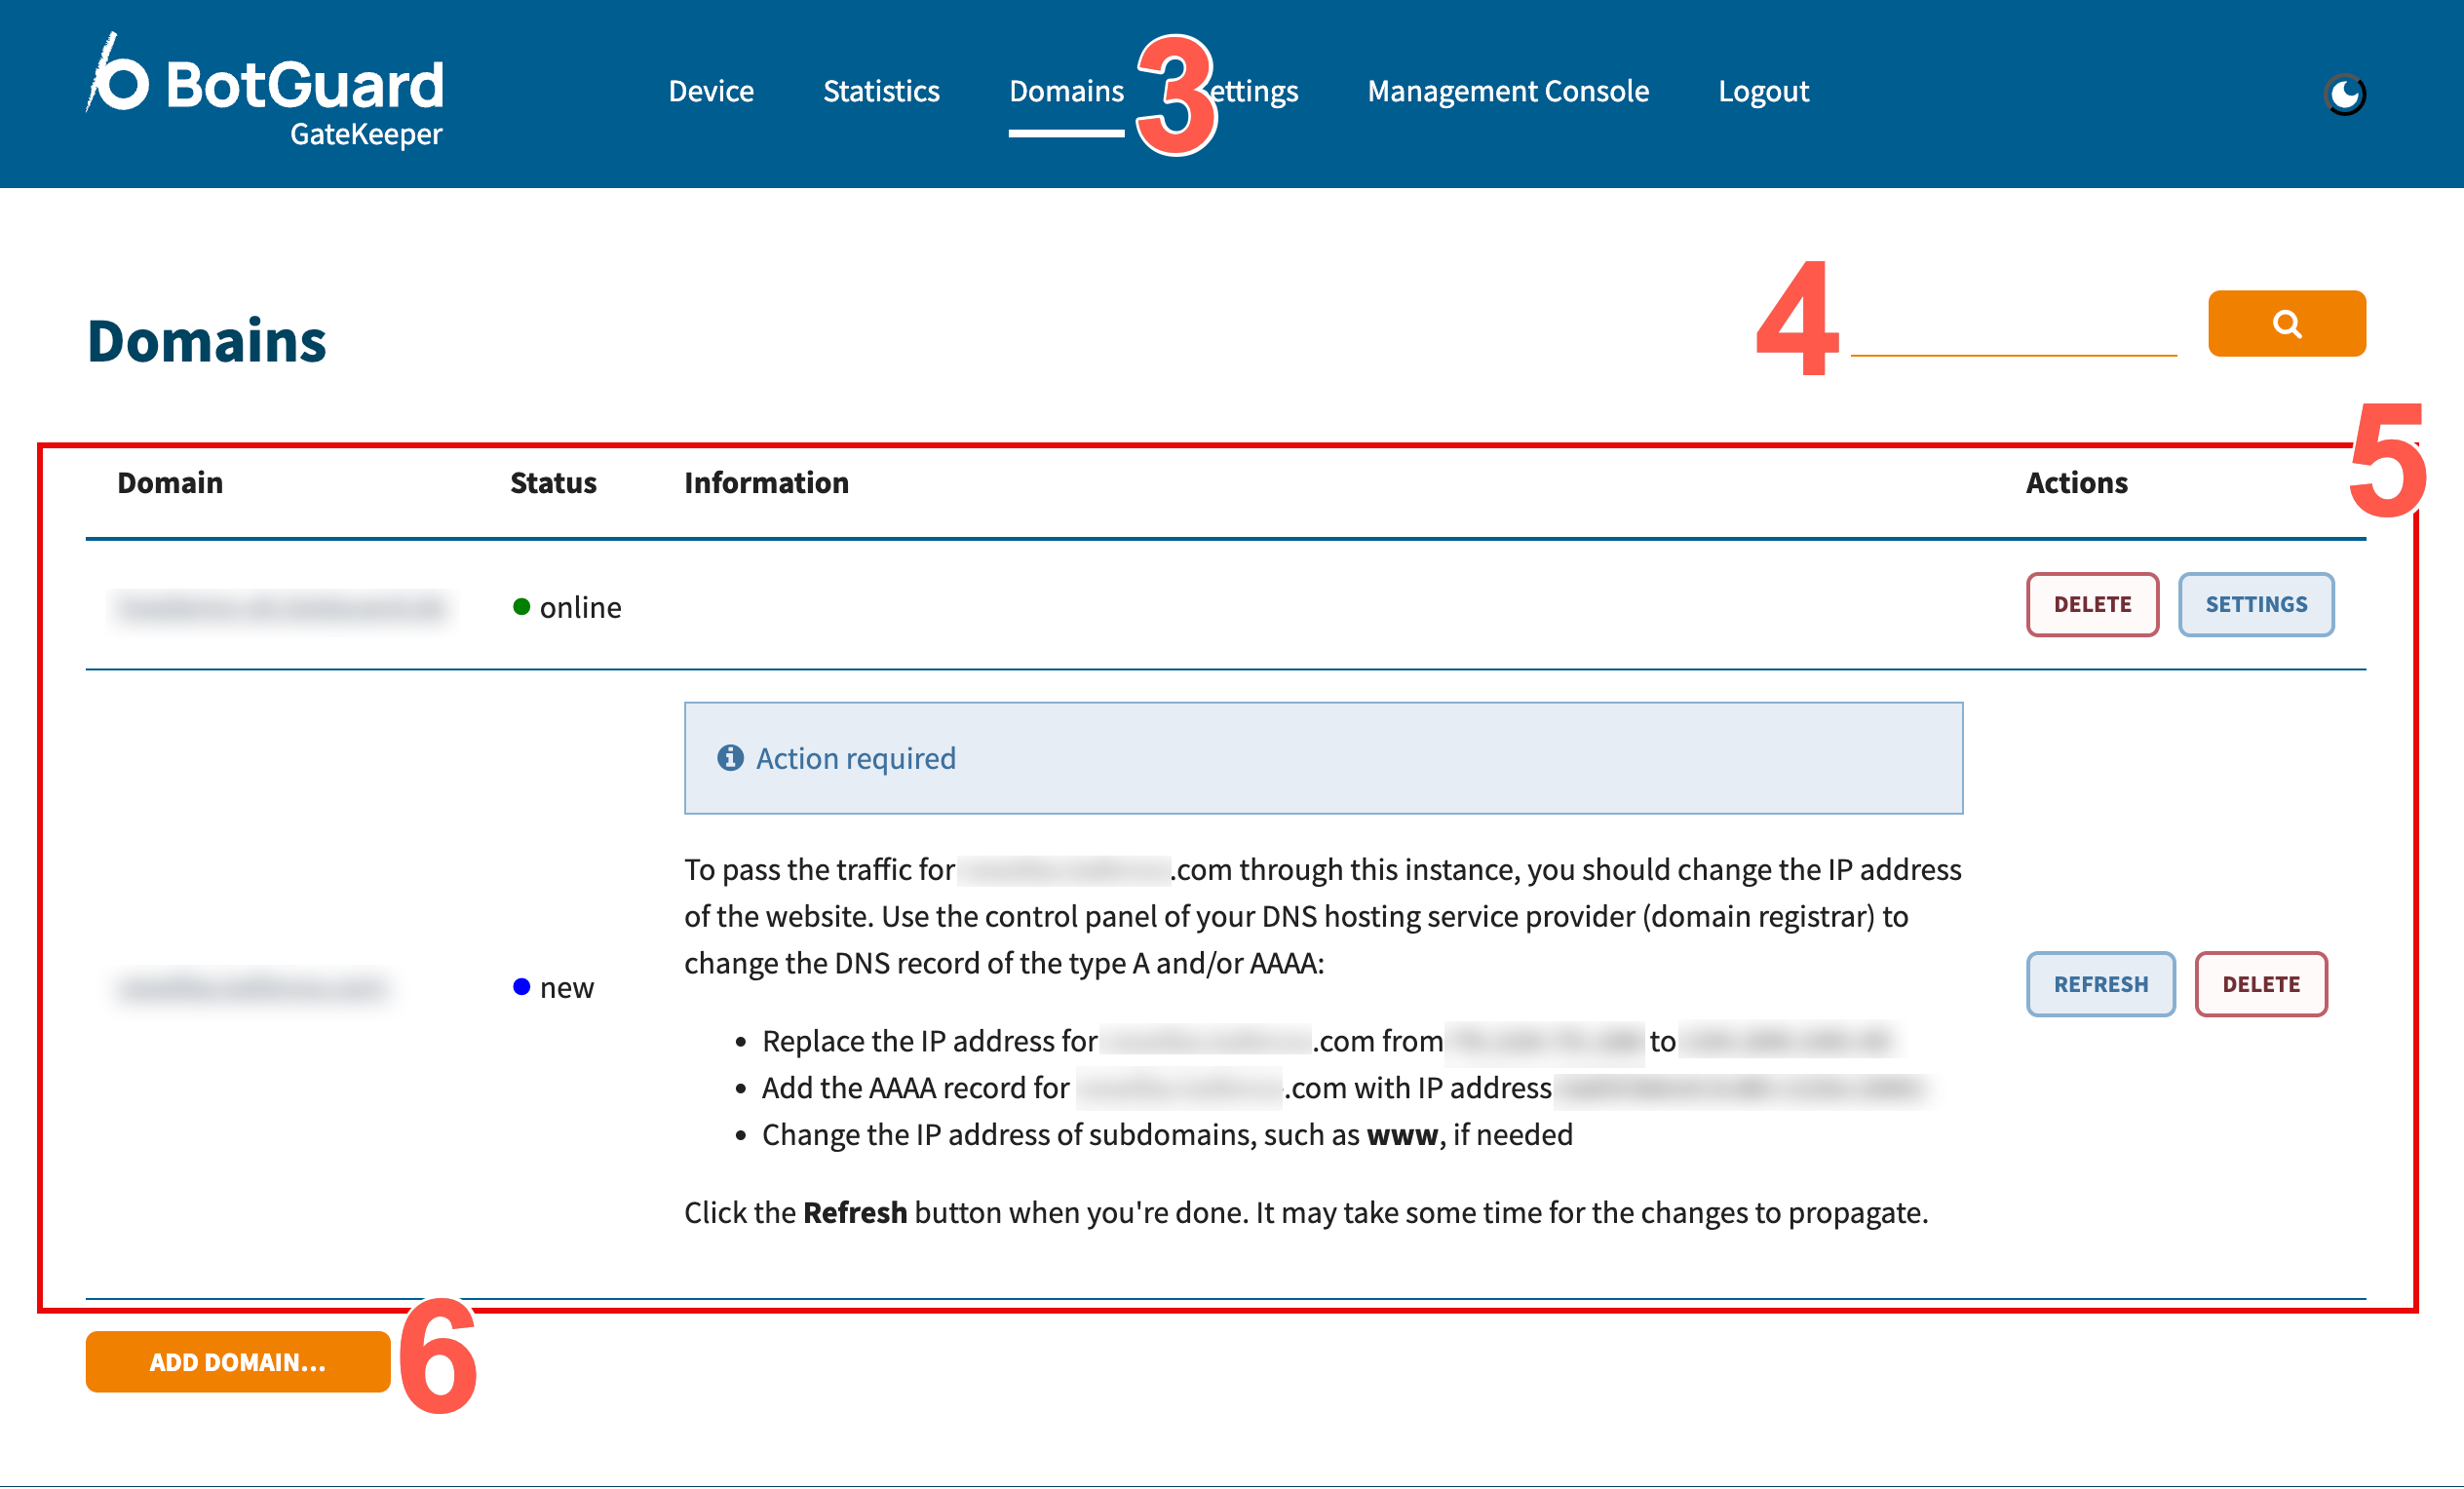
- Optionally, use the search field to enter any (partial or full) domain name, which filters the table below. As you type, GateKeeper will dynamically narrow the list to only those domains which match your query. This is especially useful when you manage a large number of domains and want to locate one quickly.
-
Familiarize yourself with the main table, which lists every domain currently added to your GateKeeper instance. It is divided into four columns:
- Domain - This displays the full domain name for each listed domain. Each entry is a clickable link and clicking the domain name will take you to the domain’s configuration page.
-
Status - This column displays a colored indicator (green, blue, etc.) alongside a status label such as online, or new. The following are all potential status labels:
Domain status Indicator Color Description New ● Domain has been added but DNS not yet verified. Setup ● Domain is in initial setup, pending configuration steps. Ready ● Domain is configured and ready to go live (pre-production). Online ● Domain is live and GateKeeper is actively proxying traffic without any errors. Deleted ● Domain has been removed from GateKeeper and is inactive. Error ● Domain encountered an error during setup or operation. Certificate ● GateKeeper is in the process of obtaining or renewing a certificate. -
Information - Provides a brief summary of next steps or additional context for a given domain. For example, a domain marked New will show guidance on which A/AAAA records need to be updated at your DNS provider. If no special action is required, this cell may be blank to indicate that there is no outstanding tasks.
-
Actions - This column contains two buttons that let you manage each domain entry directly from the table:
- SETTINGS Click this to open the configuration panel for the domain, allowing you to adjust advanced options (e.g., SSL certificates, forwarding behavior, IP whitelists). For more information about the Settings button, refer to the next section - Domain Settings.
-
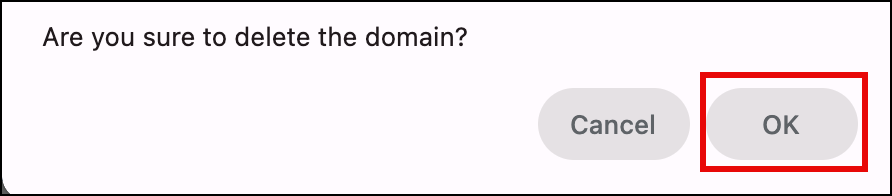
DELETE permanently removes the selected domain from GateKeeper. Any DNS records still pointing to GateKeeper’s IP will no longer be served once you click delete. After clicking DELETE, click OK on the deletion prompt that displays.
-
REFRESH displays only when a domain is new or has one or more required actions. Make any necessary configuration changes and then click this to instruct GateKeeper to re‐check DNS records immediately, which confirms that everything is configured correctly.
-
To add a domain to your GateKeeper instance, click ADD DOMAIN. For more information about adding a domain, refer to the dedicated section - Adding a domain.
Domain Settings
Execute the following instructions to configure a domain:
- In your web browser, open Blackwall GateKeeper’s login page.
- Authenticate using your user credentials.
- In the top menu bar of GateKeeper’s UI, click Domains, which displays the Domains page.
- From the table displayed on this page, click the SETTINGS button that corresponds with the domian that you wish to configure.
- Ensure that the name of the domain you wish to configure is displayed in this field. This is a read‐only text input showing the fully qualified domain name. If this doesn't match the domain you intended to edit, navigate back to the Domains overview and select the correct entry.
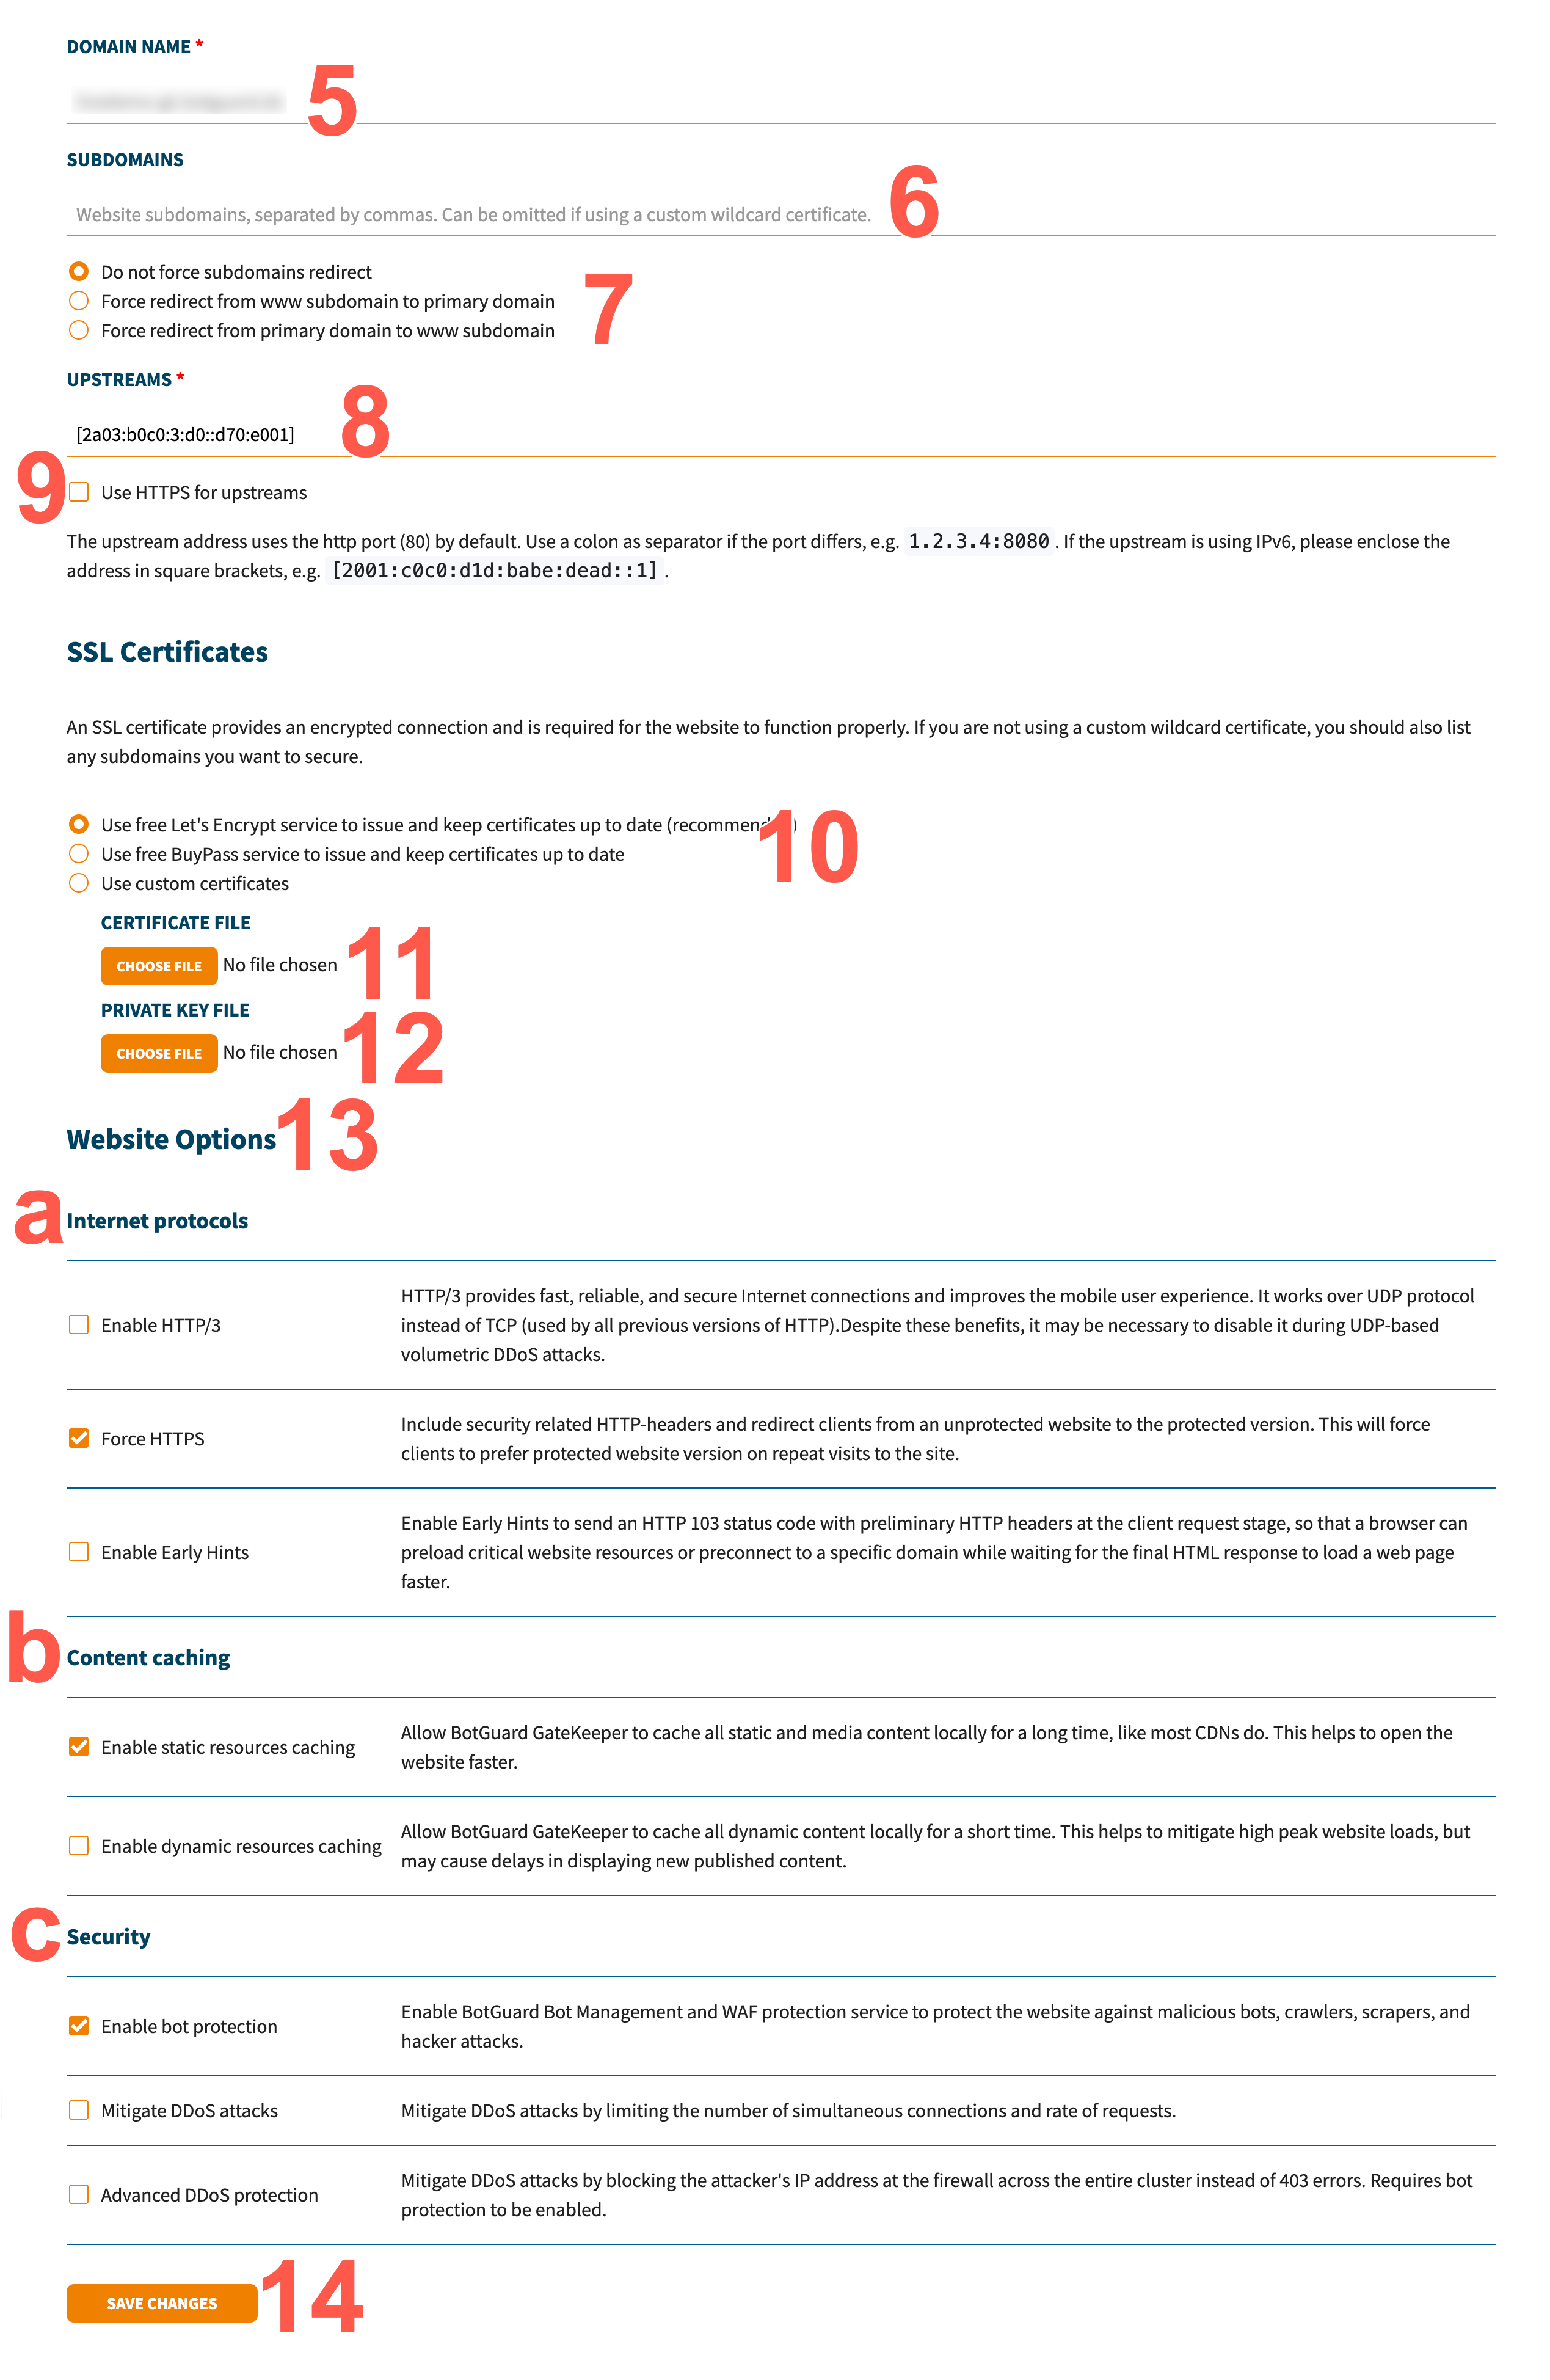
- In the SUBDOMAINS field, enter any additional hostnames in comma-separated format that should be covered by GateKeeper’s certificate for this domain. This does not apply if you are using a custom wildcard certificate.
- If you added an additional hostname in the previous step, select one of these radio buttons to control how requests to any listed subdomains are redirected back to the canonical hostname.
- Enter the IP address (or hostname + port) of your origin server(s) in this field. By default, GateKeeper assumes port 80 for HTTP, but if your origin listens on a different port, append it after a colon. For example, 1.2.3.4:8080 for IPv4, or [2001:c0c0:d1d:babe:dead::1]:8080 for IPv6). Multiple upstreams can be separated by commas. If using multiple upstreams, GateKeeper will load-balance between them.
- Check this checkbox if your origin(s) serve content over an HTTPS (port 443). When selected, GateKeeper will connect securely to the upstream rather than using HTTP. If left unchecked, GateKeeper will use HTTP (port 80) by default to fetch content from the origin.
- GateKeeper requires a valid SSL/TLS certificate to serve your website over HTTPS. Choose one of the following options:
- Use free Let’s Encrypt service to issue and keep certificates up to date (recommended) - GateKeeper automatically requests and renews a certificate for your domain & listed subdomains.
- Use free BuyPass service to issue and keep certificates up to date - GateKeeper will request a certificate from BuyPass instead of Let’s Encrypt.
- Use custom certificates If you already have a signed certificate and private key (for example, from a third-party CA or a wildcard certificate that you purchased), select this option to upload your files. If you choose this file, you must upload necessary files in the next two steps.
- If you selected Use custom certificates in the previous step, for CERTIFICATE FILE click the CHOOSE FILE button to upload your .crt (or .pem) file containing the public certificate chain.
- If you uploaded a file in the certificate file in previous step, for PRIVATE KEY FILE click the CHOOSE FILE button to upload the corresponding .key file (your private key). Both files are required if you chose Use custom certificates previously.
- The Website Options section contains a series of checkboxes under sub-headings. These checkboxes enable you to configure how GateKeeper interacts with your domains.
- Internet protocols - Control advanced HTTP/encryption features:
- Enable HTTP/3 - GateKeeper will speak HTTP/3 (QUIC/UDP) to compatible clients, improving performance on modern browsers and mobile devices. Leave unchecked if you need to disable HTTP/3 for compatibility or DDoS concerns.
- Force HTTPS - Enable to automatically redirect all incoming HTTP (port 80) requests to HTTPS (port 443). When checked, GateKeeper also adds security headers to encourage browsers to use only HTTPS.
- Enable Early Hints - Allows GateKeeper to send HTTP 103 “Early Hints” responses during the initial TLS handshake, so that browsers can start preloading resources (e.g., CSS/JS) before the final HTML is delivered. This improves load times, leading to a faster browsing experience.
- Content Caching - Decide how GateKeeper should cache your site’s assets:
- Enable static resources caching - If checked, GateKeeper caches images, CSS, JavaScript, and other static files locally on the edge. This speeds up asset delivery and reduces load on your origin server.
- Enable dynamic resources caching - If checked, GateKeeper also caches HTML pages and other 'dynamic' content for a configurable short period. Use with caution: caching dynamic content may cause delays in showing newly published data (e.g., blog posts, user-specific pages).
- Security - Configure GateKeeper’s built-in bot management and DDoS mitigation features:
- Enable bot protection - When checked, GateKeeper’s Web Application Firewall (WAF) and Bot Management services inspect incoming requests to block known malicious bots, scrapers, and automated attacks.
- Mitigate DDoS attacks - Limits the number of simultaneous connections and the rate of requests from a single IP to help prevent volumetric or application-layer DDoS floods. Requires bot protection enabled first.
- Advanced DDoS protection - If enabled (and if bot protection is already on), GateKeeper will block attacking IPs at the firewall level for the entire cluster—returning a TCP RST or UDP rejection instead of serving HTTP 403 pages. Use this only if your site has experienced large-scale DDoS events.
- Internet protocols - Control advanced HTTP/encryption features:
- Once you have finished modifying any of the above settings, click SAVE CHANGES to apply your updates. GateKeeper immediately attempts to validate SSL certificates, update DNS checks (if necessary), and reconfigure its servers. If any required fields are missing or invalid (for example, an upstream address is unreachable), GateKeeper displays an error.
Adding a Domain
Execute the following instructions to add a domain:
- In your web browser, open Blackwall GateKeeper’s login page.
- Authenticate using your user credentials.
- In the top menu bar of GateKeeper’s UI, click Domains, which displays the Domains page.
-
Below the table displayed on this page, click the ADD DOMAIN button.

-
Then follow the steps 5-13 in the previous section Domain Settings.